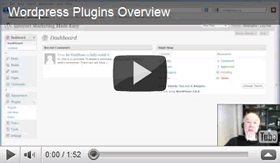
 WordPress Plugins are very important; they allow you to extend the functionality of your website within minutes. To manage WordPress Plugins, login to your WordPress Dashboard, then select Plugins from the left menu. The Plugins screen appears.
To add a new Plugin,
- Click the Add New button near the top of the screen. The Install Plugins screen appears.
- Use the search box to find Plugins relating to the functionality you desire (e.g. type ‘weather’ to find Plugins regarding weather, etc) then click Search. A list of search results shall appear.
- Use the Plugin Descriptions and Reviews to determine which one you want, and then click the Install Now link beneath the Plugin title.
- Click OK when asked if you want to install that particular Plugin. The Installing Plugin screen will appear.
- Click the Activate Plugin link (next to Actions).
Voila! Your new Plugin should be installed and ready for use. To place it on your webpage:
- Select Widgets from the left menu (under Appearance). The Widgets screen appears. The new Plugin will appear by title under the Available Widgets area.
- Drag and drop the Plugin Widget from the left over to one of the Widget Areas on the right.
- Expand the Widget by clicking the small down-arrow in its title box, and enter any data it requires. Select whichever options you wish.
- Click Save.
That’s it! Now return to your website, refresh your browser. The plugin should appear just as you instructed it to via your Dashboard. If you wish to modify it, simply go back into the Widget area and work from there.
There are literally tens of thousands of WordPress Plugins to choose from. An excellent place to start is the WordPress website (http://www.wordpress.org/extend/plugins) where you can search for them by keyword, view featured plugins and see lists of the most popular plugins, etc. Experiment freely. You are completely in control of your WordPress website!
